Capri L4-1597cc 1.6L DOHC Turbo (1991)

2.
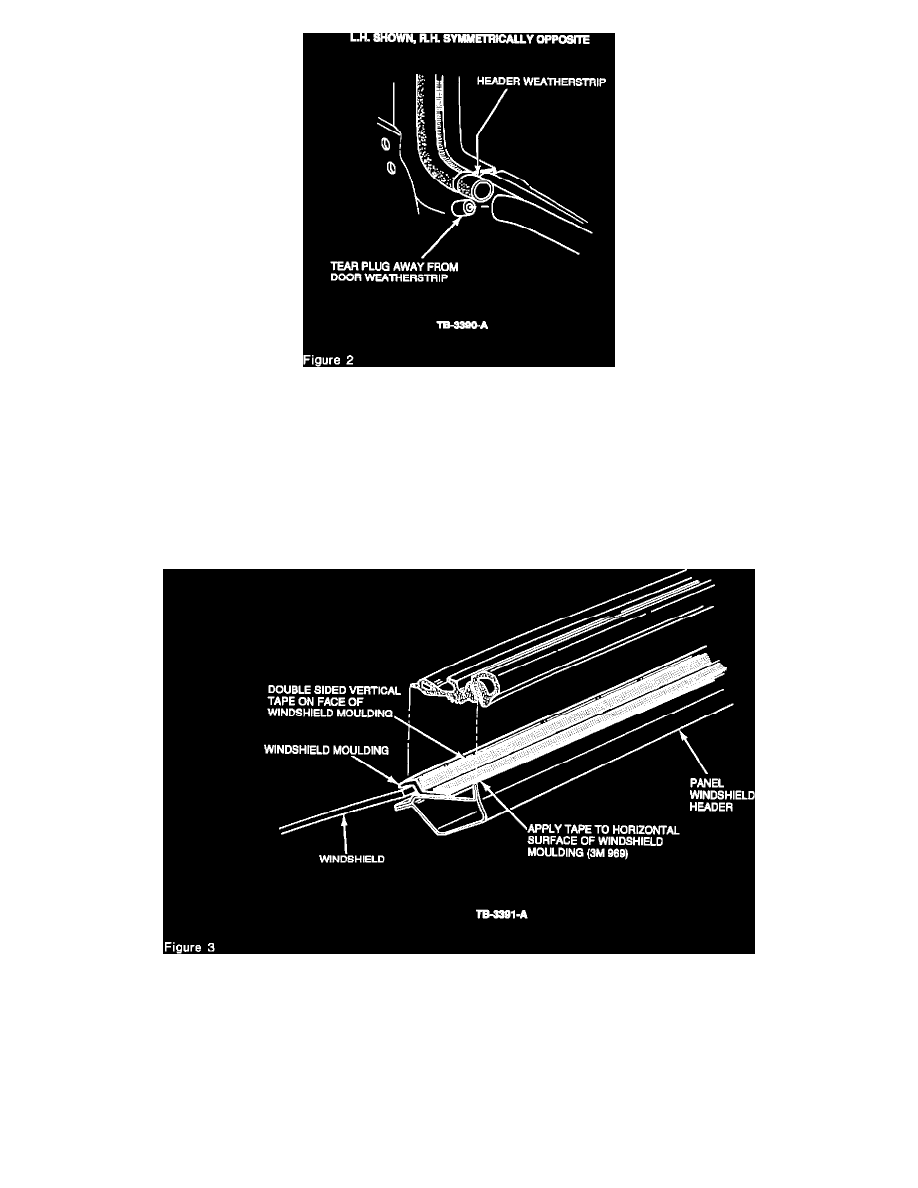
Tear plug away from the ends of door weatherstrips, Figure 2.
3.
With the windshield header weatherstrip removed:
a.
Peel away any double-sided tape from the horizontal and vertical faces of the windshield moulding.
b.
Clean surfaces with a suitable solvent, and wipe with a clean cloth.
4.
Apply the new tape (F2JY-76514-A46S) to the front vertical face of the windshield upper moulding. Press tape firmly to ensure full contact. DO
NOT remove pull tape.
5.
Apply a strip of 3M Brand "969" adhesive tape (FOJY-76514-A46A, or equivalent) along the length of the horizontal face of the windshield upper
moulding. Do not peel the backing paper from the tape, Figure 3.
NOTE:
ONE PACKAGE OF 3M BRAND "969" ADHESIVE TAPE CONTAINS ENOUGH TAPE TO REPAIR ABOUT FIFTEEN (15) VEHICLES.
6.
Clean the replacement weatherstrip lower surface.
7.
Install the weatherstrip to the header, beginning with the corners and work toward the middle:
